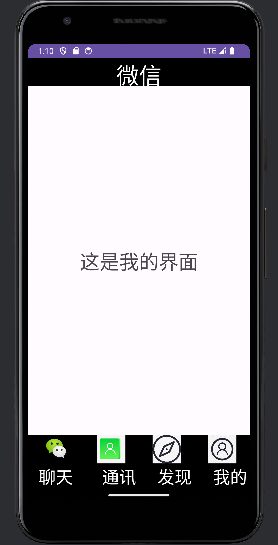
AS类微信界面开发 功能要求 1.、请根据课程内容设计一个app的门户框架,需要实现3-4个tab切换效果;本功能要求需要的技术为:activity、xml、fragment
2、在任一tab页中实现列表效果;本功能的实现需要使用 recycleview;
开发技术 开发工具:as
版本:API 24 Android 7.0
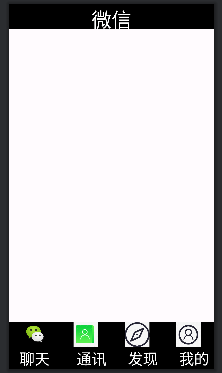
思路分析 类微信界面主要分为上中下三个部分,其中上下为 top.xml和 bottom.xml 为基础信息显示。
主界面中间部分由4个页面叠加,在进行选择内容时变换界面
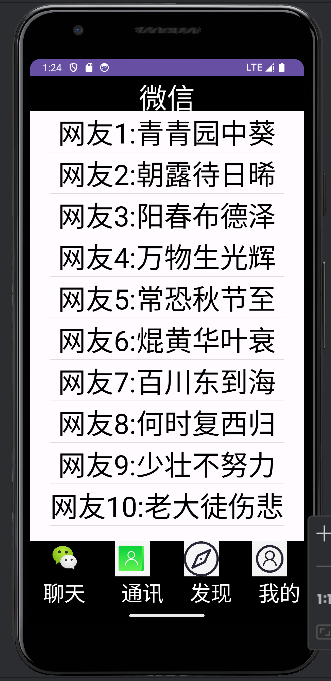
其中我选择在聊天界面实现列表效果,采用 recycleview
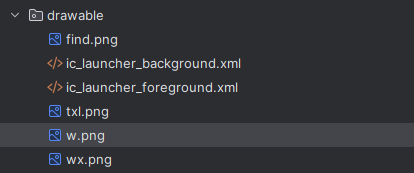
设计过程 1. 导入所需图片到drawable目录下
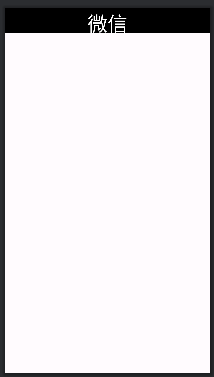
2. 布局设计 xml文件编写 标题栏top.xml 图片
代码
1
2
3
4
5
6
7
8
9
10
11
12
13
14
15
16
17
18
19
20
<?xml version="1.0" encoding="utf-8" ?> <LinearLayout xmlns:android ="http://schemas.android.com/apk/res/android" android:layout_width ="match_parent" android:layout_height ="50dp" android:background ="@color/black" android:gravity ="center" android:orientation ="vertical" > <TextView android:id ="@+id/textView" android:layout_width ="match_parent" android:layout_height ="wrap_content" android:layout_weight ="1" android:background ="@color/black" android:gravity ="center_horizontal" android:text ="微信" android:textColor ="@color/white" android:textSize ="40sp" > </TextView > </LinearLayout >
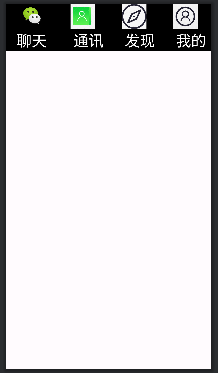
底部选择栏bottom.xml 图片
代码
1
2
3
4
5
6
7
8
9
10
11
12
13
14
15
16
17
18
19
20
21
22
23
24
25
26
27
28
29
30
31
32
33
34
35
36
37
38
39
40
41
42
43
44
45
46
47
48
49
50
51
52
53
54
55
56
57
58
59
60
61
62
63
64
65
66
67
68
69
70
71
72
73
74
75
76
77
78
79
80
81
82
83
84
85
86
87
88
89
90
91
92
93
94
95
96
97
98
99
100
101
102
103
104
105
106
107
108
109
110
111
112
113
114
115
<?xml version="1.0" encoding="utf-8" ?> <LinearLayout xmlns:android ="http://schemas.android.com/apk/res/android" xmlns:tools ="http://schemas.android.com/tools" android:layout_width ="match_parent" android:layout_height ="wrap_content" android:baselineAligned ="false" android:orientation ="horizontal" > <LinearLayout android:id ="@+id/id_tab_wx" android:layout_width ="match_parent" android:layout_height ="match_parent" android:layout_weight ="1" android:gravity ="center" android:orientation ="vertical" > <ImageView android:id ="@+id/id_tab_wx_img" android:layout_width ="match_parent" android:layout_height ="50dp" android:background ="@color/black" android:src ="@drawable/wx" /> <TextView android:id ="@+id/id_tab_wx_txt" android:layout_width ="126dp" android:layout_height ="wrap_content" android:background ="@color/black" android:gravity ="center" android:text ="聊天" android:textColor ="@color/white" android:textSize ="30sp" /> </LinearLayout > <LinearLayout android:id ="@+id/id_tab_friend" android:layout_width ="match_parent" android:layout_height ="match_parent" android:layout_weight ="1" android:gravity ="bottom" android:orientation ="vertical" > <ImageView android:id ="@+id/id_tab_friend_img" android:layout_width ="match_parent" android:layout_height ="50dp" android:background ="@color/black" android:src ="@drawable/txl" /> <TextView android:id ="@+id/id_tab_friend_txt" android:layout_width ="126dp" android:layout_height ="wrap_content" android:gravity ="center" android:textColor ="@color/white" android:background ="@color/black" android:textSize ="30sp" android:text ="通讯" /> </LinearLayout > <LinearLayout android:id ="@+id/id_tab_address" android:layout_width ="match_parent" android:layout_height ="match_parent" android:layout_weight ="1" android:gravity ="bottom" android:orientation ="vertical" > <ImageView android:id ="@+id/id_tab_address_img" android:layout_width ="match_parent" android:layout_height ="50dp" android:background ="@color/black" android:src ="@drawable/find" /> <TextView android:id ="@+id/id_tab_address_txt" android:layout_width ="126dp" android:layout_height ="wrap_content" android:gravity ="center" android:textColor ="@color/white" android:background ="@color/black" android:textSize ="30sp" android:text ="发现" /> </LinearLayout > <LinearLayout android:id ="@+id/id_tab_setting" android:layout_width ="match_parent" android:layout_height ="match_parent" android:layout_weight ="1" android:gravity ="bottom" android:orientation ="vertical" > <ImageView android:id ="@+id/id_tab_setting_img" android:layout_width ="match_parent" android:layout_height ="50dp" android:background ="@color/black" android:src ="@drawable/w" /> <TextView android:id ="@+id/id_tab_setting_txt" android:layout_width ="126dp" android:layout_height ="wrap_content" android:gravity ="center" android:textColor ="@color/white" android:background ="@color/black" android:textSize ="30sp" android:text ="我的" /> </LinearLayout > </LinearLayout >
4个fragment.xml 通过一个xml文件将标题栏部分和底部选择栏部分添加到一个xml文件里面,再两个文件中间添加一个content部件,将四个fragment当做卡片压入中间主体部分。四个fragment的xml文件类似,故只放一个文件的内容。
fragment_lt.xml 第一个聊天界面我设置列表效果,只需要添加一个 recycleview 实现列表效果即可
图片
代码
1
2
3
4
5
6
7
8
9
10
11
12
13
14
15
16
17
18
19
20
<?xml version="1.0" encoding="utf-8" ?> <FrameLayout xmlns:android ="http://schemas.android.com/apk/res/android" xmlns:tools ="http://schemas.android.com/tools" android:layout_width ="match_parent" android:layout_height ="match_parent" xmlns:app ="http://schemas.android.com/apk/res-auto" tools:context =".ltFragment" > <androidx.recyclerview.widget.RecyclerView android:id ="@+id/recyclerview" android:layout_width ="match_parent" android:layout_height ="match_parent" app:layout_constraintBottom_toBottomOf ="parent" app:layout_constraintEnd_toEndOf ="parent" app:layout_constraintStart_toStartOf ="parent" app:layout_constraintTop_toTopOf ="parent" /> </FrameLayout >
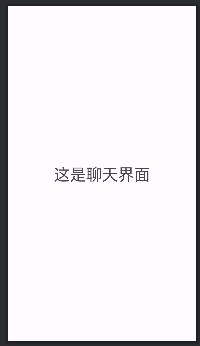
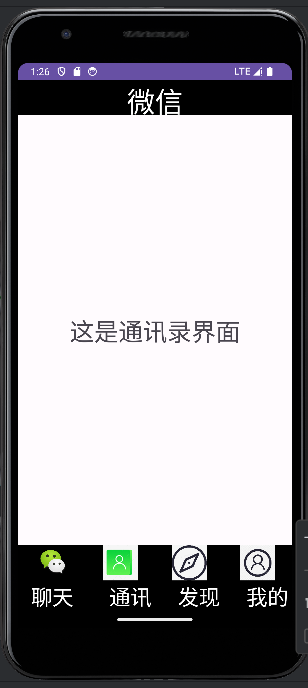
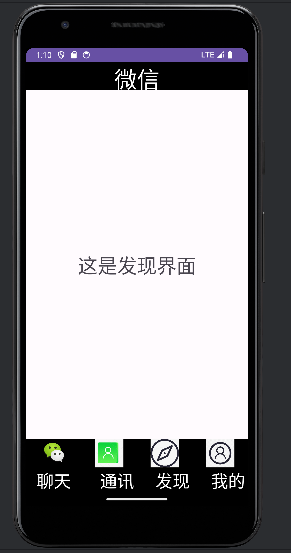
其他3个xml页面设置为介绍界面即可,效果和代码如下所示
图片
代码
1
2
3
4
5
6
7
8
9
10
11
12
13
14
15
16
<?xml version="1.0" encoding="utf-8" ?> <FrameLayout xmlns:android ="http://schemas.android.com/apk/res/android" xmlns:tools ="http://schemas.android.com/tools" android:layout_width ="match_parent" android:layout_height ="match_parent" tools:context =".ltFragment" > <TextView android:layout_width ="match_parent" android:layout_height ="match_parent" android:gravity ="center" android:textSize ="35sp" android:text ="这是聊天界面" /> </FrameLayout >
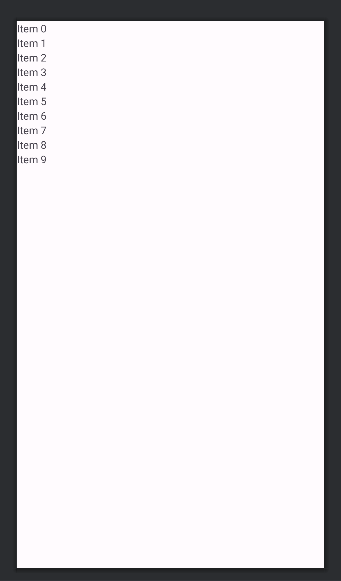
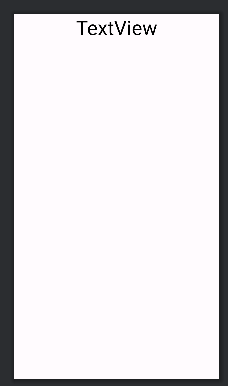
上文已经在相应的 fragment_lt.xml 文件里面添加了 recycleview,此时再添加一个item.xml页面用于页面显示,只包含一个textview
item.xml 图片
代码
1
2
3
4
5
6
7
8
9
10
11
12
13
14
15
<?xml version="1.0" encoding="utf-8" ?> <LinearLayout xmlns:android ="http://schemas.android.com/apk/res/android" android:layout_width ="match_parent" android:layout_height ="wrap_content" > <TextView android:id ="@+id/itemview" android:layout_width ="wrap_content" android:layout_height ="wrap_content" android:layout_weight ="1" android:gravity ="center" android:text ="TextView" android:textColor ="@android:color/black" android:textSize ="40sp" /> </LinearLayout >
main.xml 图片
代码
1
2
3
4
5
6
7
8
9
10
11
12
13
14
15
16
17
18
19
20
21
22
23
<?xml version="1.0" encoding="utf-8" ?> <LinearLayout xmlns:android ="http://schemas.android.com/apk/res/android" xmlns:tools ="http://schemas.android.com/tools" xmlns:app ="http://schemas.android.com/apk/res-auto" android:layout_width ="match_parent" android:layout_height ="match_parent" android:orientation ="vertical" tools:context =".MainActivity" > <include layout ="@layout/top" > </include > <FrameLayout android:id ="@+id/content" android:layout_width ="wrap_content" android:layout_height ="0dp" android:layout_gravity ="center" android:layout_weight ="1" > </FrameLayout > <include layout ="@layout/bottom" > </include > </LinearLayout >
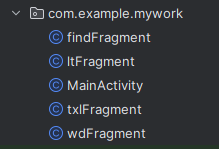
3. Java文件代码编写 首先依次创建4个fragement
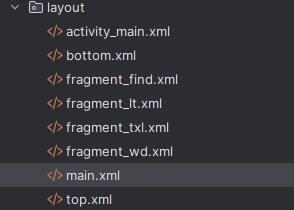
会在相应的layout文件夹下生成4个.xml文件
目前的界面只是一个比较简单的界面,需要完成的功能仅有展示和通过点击部件更换中间部分展示的界面,所以要考虑的代码部分分别为以下四个内容:
点击监听部分onclick
将4个fragment压入content里面的代码部分
将四个卡片隐藏起来的代码部分
当点击时展示的界面代码部分
创建4个Frangment变量、1个管理对象FragmentManager变量 、4个LinearLayout变量对象
1
2
3
Fragment fragment1,fragment2,fragment3,fragment4;
新建一个inital函数用以给Fragment页面初始化,在此函数中,将此前定义个4个Fragment变量使用fragmentManager添加到main文件中的中间主体部分的布局中
1
2
3
4
5
6
7
8
9
10
public void inital () {FragmentTransaction ft = fm.beginTransaction()
在点击四个部件时需要展示其所代表的界面,故编写新的一个函数showfragment,展示fragment界面
1
2
3
4
5
private void fragmentshow (Fragment fragment) {FragmentTransaction transaction = fm.beginTransaction()
而在切换界面时,需要对原先的界面进行隐藏之后再展示所需界面,故编写一个新的函数fragmentHide,将所有的fragment界面都隐藏
1
2
3
4
5
6
7
8
private void fragmenthide () {FragmentTransaction ft = fm.beginTransaction()
仅对底部选择栏的四个控件进行监听,并根据监听所得到的结果调用fragment界面
1 2 3 4 linearLayout1.setOnClickListener(this );this );this );this );
注意这里设置了全局监听
因此要修改和覆写onClick函数
修改此处
覆写onClick函数
1
2
3
4
5
6
7
8
9
10
11
12
13
@Override public void onClick (View view) {if (view.getId()==R.id.id_tab_wx){else if (view.getId()==R.id.id_tab_friend){else if (view.getId()==R.id.id_tab_address){else if (view.getId()==R.id.id_tab_setting){
而在最开始的界面自然就是聊天界面,故在最开始的时候就调用聊天的fragment
1 fragmentshow (fragment1);
由于点击聊天要实现列表功能,固还需要在 ltfragment 里面实现 recycleview 功能
我们先初始化定义一些变量recyclerView,list,context, myadapter(一个适配器)
1
2
3
4
private RecyclerView recyclerView;private List<String> list;private Context context;private Myadapter myadapter;
然后我们开始在onCreateView()函数底下写入适配器需要的一些参数和数据:
1
2
3
4
5
6
7
8
9
10
11
12
13
14
15
16
17
18
19
20
21
@Override public View onCreateView (LayoutInflater inflater, ViewGroup container, Bundle savedInstanceState) {false );new ArrayList ();new LinearLayoutManager (context);new Myadapter (context,list);new DividerItemDecoration (context,LinearLayoutManager.VERTICAL));return view;
分析代码
初始化列表内容
1
2
3
4
5
6
7
8
9
10
11
12
private void initData () {"网友1:青青园中葵" );"网友2:朝露待日晞" );"网友3:阳春布德泽" );"网友4:万物生光辉" );"网友5:常恐秋节至" );"网友6:焜黄华叶衰" );"网友7:百川东到海" );"网友8:何时复西归" );"网友9:少壮不努力" );"网友10:老大徒伤悲" );
创建一个LinearLayoutManager对象,并将其赋值给manager变量。然后通过调用setOrientation(LinearLayoutManager.VERTICAL)方法,将布局方向设置为垂直方向。
1
2
LinearLayoutManager manager=new LinearLayoutManager (context);
myadapter = new Myadapter(context, list); 创建一个名为myadapter的自定义适配器对象,并传入context和list作为参数进行初始化。
recyclerView.setAdapter(myadapter); 将创建的适配器对象myadapter设置给recyclerView,用于显示数据。recyclerView.setLayoutManager(manager); 将之前创建的布局管理器manager设置给recyclerView,用于控制列表的布局方式。
return view; 返回包含recyclerView的视图对象。
1
2
3
4
5
6
myadapter = new Myadapter (context,list);new DividerItemDecoration (context,LinearLayoutManager.VERTICAL));return view;
ltfragment全部代码展示 1 2 3 4 5 6 7 8 9 10 11 12 13 14 15 16 17 18 19 20 21 22 23 24 25 26 27 28 29 30 31 32 33 34 35 36 37 38 39 40 41 42 43 44 45 46 47 48 49 50 51 52 53 54 55 56 57 58 59 60 61 62 63 64 65 66 67 68 69 70 71 72 73 74 75 76 77 78 79 80 81 82 83 84 85 86 87 88 89 90 91 92 93 94 95 96 97 98 99 100 101 102 103 104 105 106 107 108 109 package com.example.mywork;import android.content.Context;import android.os.Bundle;import androidx.fragment.app.Fragment;import androidx.recyclerview.widget.DividerItemDecoration;import androidx.recyclerview.widget.LinearLayoutManager;import androidx.recyclerview.widget.RecyclerView;import android.view.LayoutInflater;import android.view.View;import android.view.ViewGroup;import java.util.ArrayList;import java.util.List;public class ltFragment extends Fragment {private static final String ARG_PARAM1 = "param1" ;private static final String ARG_PARAM2 = "param2" ;private String mParam1;private String mParam2;public static ltFragment newInstance (String param1, String param2) {ltFragment fragment = new ltFragment ();Bundle args = new Bundle ();return fragment;public ltFragment () {@Override public void onCreate (Bundle savedInstanceState) {super .onCreate(savedInstanceState);if (getArguments() != null ) {private RecyclerView recyclerView;private List<String> list;private Context context;private Myadapter myadapter;@Override public View onCreateView (LayoutInflater inflater, ViewGroup container, Bundle savedInstanceState) {false );new ArrayList ();new LinearLayoutManager (context);new Myadapter (context,list);new DividerItemDecoration (context,LinearLayoutManager.VERTICAL));return view;private void initData () {"网友1:青青园中葵" );"网友2:朝露待日晞" );"网友3:阳春布德泽" );"网友4:万物生光辉" );"网友5:常恐秋节至" );"网友6:焜黄华叶衰" );"网友7:百川东到海" );"网友8:何时复西归" );"网友9:少壮不努力" );"网友10:老大徒伤悲" );
MainActivity.java全部内容展示 1 2 3 4 5 6 7 8 9 10 11 12 13 14 15 16 17 18 19 20 21 22 23 24 25 26 27 28 29 30 31 32 33 34 35 36 37 38 39 40 41 42 43 44 45 46 47 48 49 50 51 52 53 54 55 56 57 58 59 60 61 62 63 64 65 66 67 68 69 70 71 72 73 74 75 76 77 78 79 80 81 82 83 84 85 86 package com.example.mywork;import androidx.appcompat.app.AppCompatActivity;import androidx.fragment.app.Fragment;import androidx.fragment.app.FragmentManager;import androidx.fragment.app.FragmentTransaction;import androidx.recyclerview.widget.LinearLayoutManager;import androidx.recyclerview.widget.RecyclerView;import android.content.Context;import android.os.Bundle;import android.view.View;import android.widget.LinearLayout;import java.util.ArrayList;import java.util.List;public class MainActivity extends AppCompatActivity implements View .OnClickListener{@Override protected void onCreate (Bundle savedInstanceState) {super .onCreate(savedInstanceState);new ltFragment ();new txlFragment ();new findFragment ();new wdFragment ();this );this );this );this );private void fragmenthide () {FragmentTransaction ft = fm.beginTransaction()public void inital () {FragmentTransaction ft = fm.beginTransaction()@Override public void onClick (View view) {if (view.getId()==R.id.id_tab_wx){else if (view.getId()==R.id.id_tab_friend){else if (view.getId()==R.id.id_tab_address){else if (view.getId()==R.id.id_tab_setting){private void fragmentshow (Fragment fragment) {FragmentTransaction transaction = fm.beginTransaction()
结果展示
代码仓库 Kylinxin/MyWork: 类微信界面源代码 (github.com)
总结 这是我第一次利用as进行移动开发实现了一个简单的类微信的界面设计,加强了我对as的fragment、基本layout、recycleview的认知,以及对xml文件进行界面编写部分以及对相关的控件有了更深入的了解,能够设计基础UI界面,实现界面跳转功能以及在fragment里面调用recycleview实现列表功能,给我提供了一定的思路进行功能和界面相互连接的代码的编写。在这次的实验下我也对AS这款软件进行了熟悉,对于其提词器的强大有了很深的印象。
——2023.10.13
